Bloglovin'
Monday, July 1, 2013
<a href="http://www.bloglovin.com/blog/5246549/?claim=rkdy3h8sv87">Follow my blog with Bloglovin</a>


Decorate to Celebrate Challenge
Wednesday, July 25, 2012
Long time no post! Where has the time gone? You'd think being a teacher, my summer would be less busy... Turns out I've been keeping myself occupied with not only summer school and trainings, but with creating wonderful things for different celebrations! This week I am going to showcase some of the wedding things I've created and sometime in the future (hopefully soon rather than later) you'll get to see some birthday invitations! On to today's post...
I am honored to have been invited to be a guest designer at Decorate to Celebrate this week! If you are unfamiliar with Decorate to Celebrate, they host challenges bi-weekly for all kinds of celebration decorations and party supplies to encourage and inspire others to create their own homemade decor. Each challenge has a theme. This one is challenge #30 (July 25th- August 7th) - Wedding / Anniversary / Engagement decorations and supplies.
Here is my project (and the first of several wedding inspired creations this week):


* Black Scallop Base - 1.88" Birthday Bash
* Pink Circle - 1.8" Birthday Bash
* White Circle - 1.65" Birthday Bash
* Gems - Paper Studio
* Name & Date - Martha Stewart Custom Stamp Set
* Hugs & Kisses from the Mr. & Mrs. - Papertrey Ink Favor It Wedding Mini Stamps
* Pink Ribbon - Offray
* White Tulle Circle - Dollar Tree
* Hershey's Hugs & Kisses for inside
I hope this has inspired you to create something for a celebration of your own. Be sure to stop by Decorate to Celebrate and submit your entry for the challenge. I'll have some more wedding creations later this week, so check back! *~*Thanks for stopping by*~*

I'm also entering this project in the following challenges * Fantabulous Cricut-Challenge Me Monday #121-Wedding Bliss
I am honored to have been invited to be a guest designer at Decorate to Celebrate this week! If you are unfamiliar with Decorate to Celebrate, they host challenges bi-weekly for all kinds of celebration decorations and party supplies to encourage and inspire others to create their own homemade decor. Each challenge has a theme. This one is challenge #30 (July 25th- August 7th) - Wedding / Anniversary / Engagement decorations and supplies.
Here is my project (and the first of several wedding inspired creations this week):


Here are the details:
* Black Scallop Base - 1.88" Birthday Bash
* Pink Circle - 1.8" Birthday Bash
* White Circle - 1.65" Birthday Bash
* Gems - Paper Studio
* Name & Date - Martha Stewart Custom Stamp Set
* Hugs & Kisses from the Mr. & Mrs. - Papertrey Ink Favor It Wedding Mini Stamps
* Pink Ribbon - Offray
* White Tulle Circle - Dollar Tree
* Hershey's Hugs & Kisses for inside
I hope this has inspired you to create something for a celebration of your own. Be sure to stop by Decorate to Celebrate and submit your entry for the challenge. I'll have some more wedding creations later this week, so check back! *~*Thanks for stopping by*~*
Birthday Card
Tuesday, April 10, 2012
Back again! Hopefully everyone had a wonderful Easter!!! I love this time of year with all of the flowers starting to bloom and the weather getting warmer. On to the card...
This is another card that my sister and I made for her to raise money for March of Dimes. These were a big hit - partially because of the versatility that they have. They could be used for males or females, children or adults. They're perfect for everyone!
I originally saw a card like this at Inking it Up Crazy with Kassidy. I think her's is much cuter, as we didn't have time to do any doodling, but it still turned out pretty cute!
* Card Mat (green) - Art Philosophy - 4"
* Card Mat (white) - 3.5"- embossed with Cuttlebug Spots and Dots
* Hat - Stork's Delivery - 3" (trimmed off the bottom part)
* Stampendous Birthday Assortment Stamp Set
* Paper Studio Gem
* Art Deco Glitter Paint
* Momento Black Ink
* Offray Orange Ribbon
* Scraps of Blue and White Paper
**All paper is by The Paper Studio**
I used the Art Deco Glitter Paint (I mentioned in my last post) on this one too. I think you might be able to see it in this project.I love the different card choice on the Art Philosophy Cartridge. I will be back again in a few days with another wonderful card, so be sure to check back! *~*Thanks for stopping by*~*
This is another card that my sister and I made for her to raise money for March of Dimes. These were a big hit - partially because of the versatility that they have. They could be used for males or females, children or adults. They're perfect for everyone!
 | ||
| A not so spectacular picture again! |
Here's how I made it:
* Card Base - Art Philosophy - Real Dial Size 4.25"* Card Mat (green) - Art Philosophy - 4"
* Card Mat (white) - 3.5"- embossed with Cuttlebug Spots and Dots
* Hat - Stork's Delivery - 3" (trimmed off the bottom part)
* Stampendous Birthday Assortment Stamp Set
* Paper Studio Gem
* Art Deco Glitter Paint
* Momento Black Ink
* Offray Orange Ribbon
* Scraps of Blue and White Paper
**All paper is by The Paper Studio**
I used the Art Deco Glitter Paint (I mentioned in my last post) on this one too. I think you might be able to see it in this project.I love the different card choice on the Art Philosophy Cartridge. I will be back again in a few days with another wonderful card, so be sure to check back! *~*Thanks for stopping by*~*
Baby Shower Banner
Friday, April 6, 2012
I have seen these banners all over Pinterest and have been dying for an occasion to make one! I finally got the opportunity to do so for my friends baby shower. I had a really hard time finding measurements, so below you will find the exact cuts I made. I think they are perfect for decorating all kinds of celebrations!


* Circle Mat - Art Philosophy - 4"
* Letters -Hello Kitty Font - 2.5"
* Paper Flowers
* Offray Ribbon
* Deco Art Glitter Paint
* All Paper Studio Papers
You'll notice that above I listed using Deco Art Glitter Paint (you can't see it in the pictures, but I used it on the letters). I first saw this at Peachy Keen Stamps (while ordering a set of their wonderful face stamps!) and was very intrigued. This was the first project I ever used it on (I've used it on others since) and I absolutely love it! It turns any paper into glitter paper and is super easy to paint on. I highly recommend it, if you are looking for a great way to add some sparkle. I hope I hope I have inspired you to go out there and decorate your next party with one of these super cute banners. I'll be back again in a few days! *~*Thanks for stopping by*~*


 | |
| Sorry for the slightly blurry picture! |
Here's What I Used:
* Scallop Base - Art Philosophy - 5"* Circle Mat - Art Philosophy - 4"
* Letters -Hello Kitty Font - 2.5"
* Paper Flowers
* Offray Ribbon
* Deco Art Glitter Paint
* All Paper Studio Papers
You'll notice that above I listed using Deco Art Glitter Paint (you can't see it in the pictures, but I used it on the letters). I first saw this at Peachy Keen Stamps (while ordering a set of their wonderful face stamps!) and was very intrigued. This was the first project I ever used it on (I've used it on others since) and I absolutely love it! It turns any paper into glitter paper and is super easy to paint on. I highly recommend it, if you are looking for a great way to add some sparkle. I hope I hope I have inspired you to go out there and decorate your next party with one of these super cute banners. I'll be back again in a few days! *~*Thanks for stopping by*~*
I'm Linking this up to:
A Cricutless Thank You!
Wednesday, April 4, 2012
I know I said I had a banner to show you in this post, but I changed my mind! The banner will be in the next one :) It isn't often any more that I make a completely Cricutless project, but recently I have created two thank you cards (one posted here and the other one to come in the future) without my Cricut! I sometimes have a hard time making thank you cards because I can never decide on a cuts to use, unless I have a specific person/purpose in mind. Therefore, it takes me forever when I do make them, so Cricutless tends to be a bit quicker. This one is a card that my sister and I made for her to sell in order to raise money for March of Dimes.
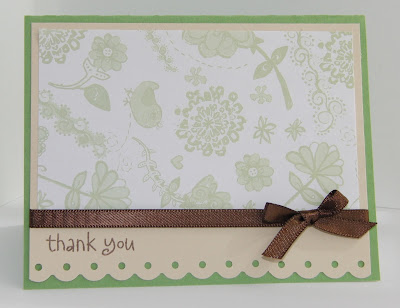 Here's how I did it:* Card Base - 5.5" x 8.5" (scored at 4.25")
* Card Mat - 5.25" x 4.25" (trimmed with Fiskars Treading Water Border Punch)
* Pattern Mat - 5" x 3"
* Offray Brown Ribbon
* Hero Arts Everyday Sayings Stamp Set
* Brown Momento Ink
This card is super simple to make. I chose earth tones to make it more gender neutral (even though it has a bow). I really liked how it turned out and how quick it was to make. I plan to make some more for my stash using other color combinations and pattern papers. I will be back in a few days with a banner I made (my first ever) for a baby shower. *~*Thanks for stopping by*~*

* Card Mat - 5.25" x 4.25" (trimmed with Fiskars Treading Water Border Punch)
* Pattern Mat - 5" x 3"
* Offray Brown Ribbon
* Hero Arts Everyday Sayings Stamp Set
* Brown Momento Ink
This card is super simple to make. I chose earth tones to make it more gender neutral (even though it has a bow). I really liked how it turned out and how quick it was to make. I plan to make some more for my stash using other color combinations and pattern papers. I will be back in a few days with a banner I made (my first ever) for a baby shower. *~*Thanks for stopping by*~*
Make a Wish!
Monday, April 2, 2012
Hopefully everyone had a fabulous weekend and April Fool's Day! I originally saw a birthday card by The Artistic Avenger and immediately knew I wanted to recreate it. I love that it is gender neutral (even with a little bit of sparkle!). The only problem was that it was made with all Stampin' Up products. I had to substitute a few materials and use my gypsy to create it.

* Card Mat (green) - 5 3/8" x 4 1/8"
* Card Mat (blue) - 5 1/4" x 4"
* Pattern Mat - 5 1/8" x 3 7/8" - Target $ Spot
* Small Candle - Any Rectangle Cut - .75" x 2"
* Medium Candle - Any Rectangle Cut - .75" x 2.15"
* Large Candle - Any Rectangle Cut - .75" x 2.30"
* Flame - Art Philosophy - 1"
* Offray 5/8" White & Red Ribbon
* Make a Wish Stamp - Joann Fabrics $1 Spot
* Momento Brown Ink
* The Paper Studio Gems
* All Other Paper and Cardstock is by The Paper Studio
I had to use my gypsy to size the candles and actually cut the rectangles. I think it turned out wonderfully and very similar, even though I didn't use the same supplies. The colors could also be changed very easily if you wanted to change it up some. I'll be back in a few days with a super cute banner - so be sure to check back! *~*Thanks for stopping by*~*

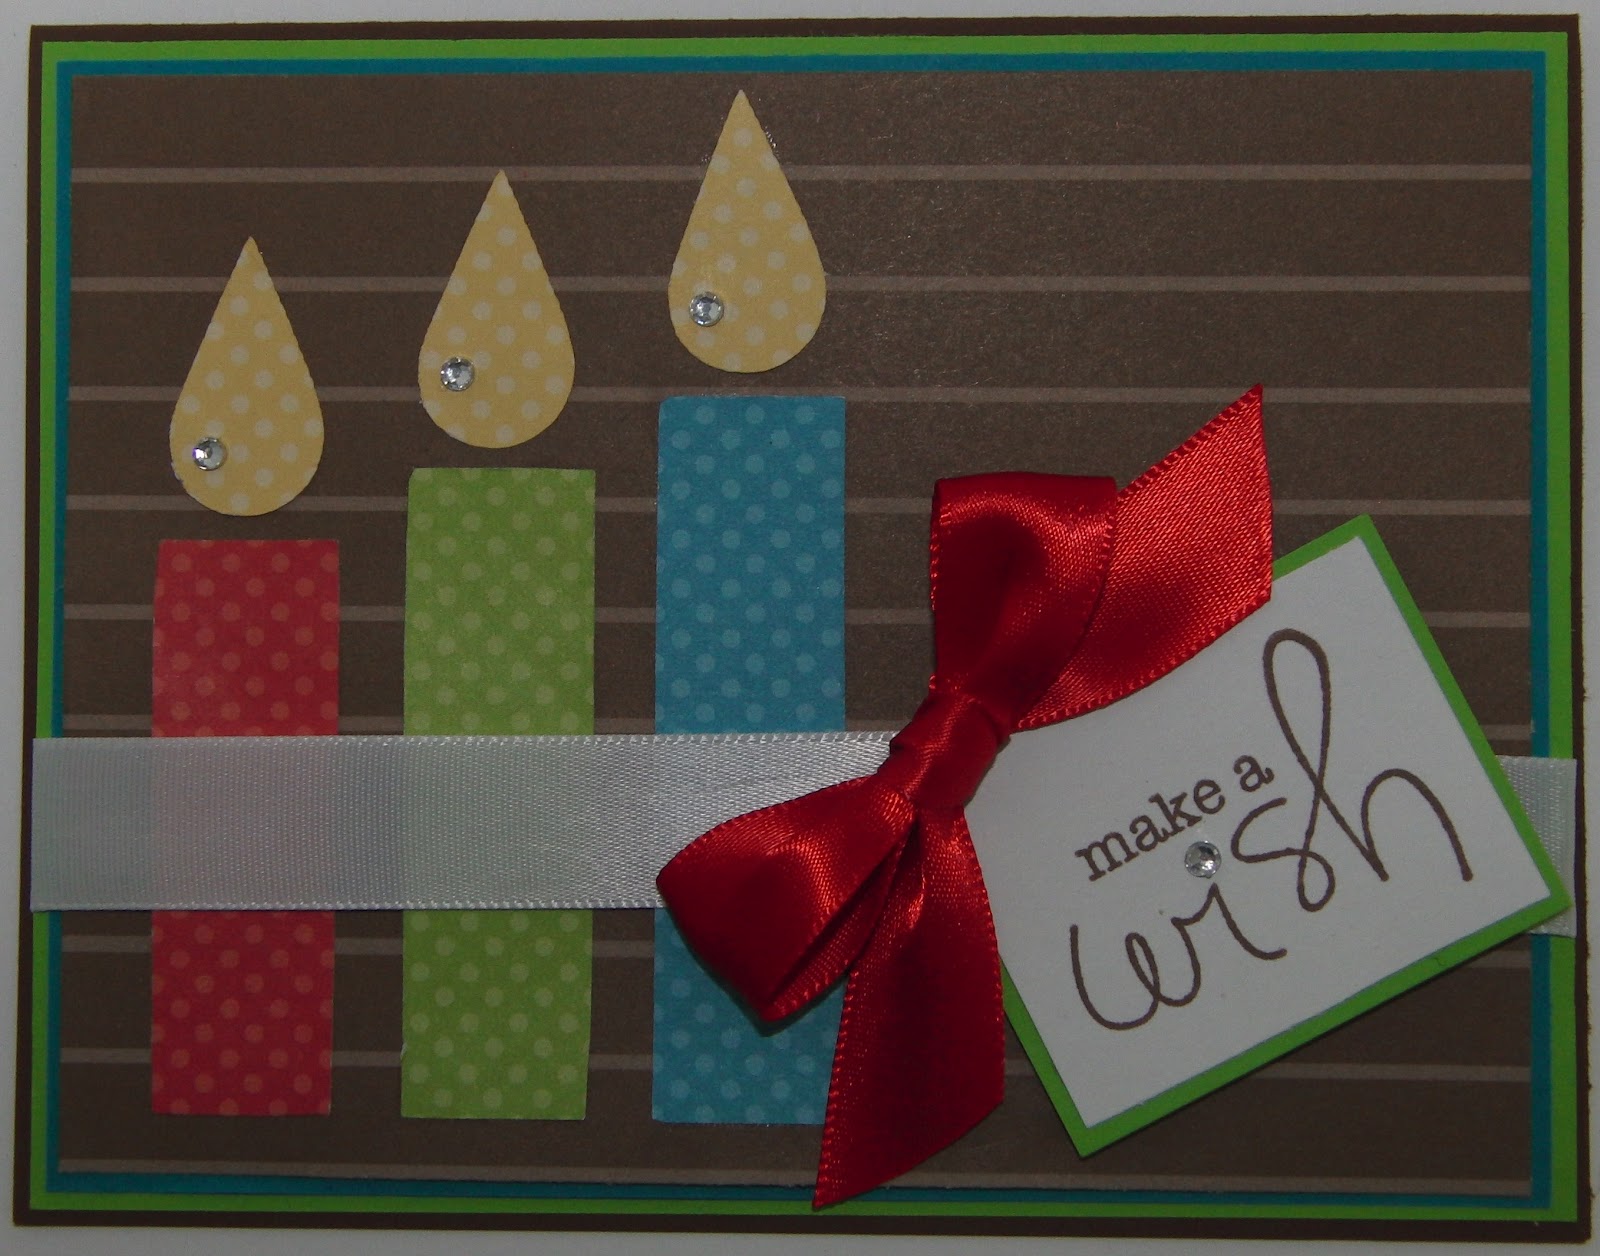 |
| Still working on my picture taking - hence the 2 pictures! |
How I made it:
* Card Base (brown) - 8 1/2" x 5 1/2" (scored at 4 1/4")* Card Mat (green) - 5 3/8" x 4 1/8"
* Card Mat (blue) - 5 1/4" x 4"
* Pattern Mat - 5 1/8" x 3 7/8" - Target $ Spot
* Small Candle - Any Rectangle Cut - .75" x 2"
* Medium Candle - Any Rectangle Cut - .75" x 2.15"
* Large Candle - Any Rectangle Cut - .75" x 2.30"
* Flame - Art Philosophy - 1"
* Offray 5/8" White & Red Ribbon
* Make a Wish Stamp - Joann Fabrics $1 Spot
* Momento Brown Ink
* The Paper Studio Gems
* All Other Paper and Cardstock is by The Paper Studio
I had to use my gypsy to size the candles and actually cut the rectangles. I think it turned out wonderfully and very similar, even though I didn't use the same supplies. The colors could also be changed very easily if you wanted to change it up some. I'll be back in a few days with a super cute banner - so be sure to check back! *~*Thanks for stopping by*~*
Wedding Thank You
Saturday, March 31, 2012
I made these minis for my secret santa (she is getting married in June) at Christmas time. I have used this cut before for wedding shower cards. I think that I will make more to give as wedding and shower gifts, especially since so many weddings happen between now and the fall!

* Plain Mat - 3.25" x 3.25"
* Patter Mat - 3" x 3"
* Dress - Forever Young - 5.25" (I forgot to write it down, but I think this is right)
* Cuttlebug swiss dots embossing folder
* Hero Arts - Everyday Sayings
* Brown Ink
* Paper by The Paper Studio
I also made some mini envelopes with my Art Philosophy cartridge (one of my new favorites). The one downfall of these mini cards is that they can not be mailed in their mini envelopes. You can however mail one in a normal A2 sized envelop with a piece of cardstock to keep it from sliding around in the envelope. *~*Thanks for stopping by*~*

Cuts & Materials:
* Card Base - 3.5" x 7"* Plain Mat - 3.25" x 3.25"
* Patter Mat - 3" x 3"
* Dress - Forever Young - 5.25" (I forgot to write it down, but I think this is right)
* Cuttlebug swiss dots embossing folder
* Hero Arts - Everyday Sayings
* Brown Ink
* Paper by The Paper Studio
I also made some mini envelopes with my Art Philosophy cartridge (one of my new favorites). The one downfall of these mini cards is that they can not be mailed in their mini envelopes. You can however mail one in a normal A2 sized envelop with a piece of cardstock to keep it from sliding around in the envelope. *~*Thanks for stopping by*~*
Baby Card
Thursday, March 29, 2012
Back again! Can you believe all of the posts lately? I can't! I'm so glad to finally have the time to post again :) I made this for a fabulous family expecting a little baby girl.

 * Base - 8.5" x 5.5"
* Plain Mat - 4" x 4.5"
* Pattern Mat - 3.75" x 4.25"
* Onesie - Stork's Delivery - 3.18" (gypsy)
* Paper Studio Stamps
* Brown Ink
* Hobby Lobby Ribbon
This card was super simple to make. I think I will make some more in pink and blue to add to my stash! *~*Thanks for stopping by*~*


(Neither of these pictures are very good - Sorry!)
The Cuts & Materials:* Plain Mat - 4" x 4.5"
* Pattern Mat - 3.75" x 4.25"
* Onesie - Stork's Delivery - 3.18" (gypsy)
* Paper Studio Stamps
* Brown Ink
* Hobby Lobby Ribbon
This card was super simple to make. I think I will make some more in pink and blue to add to my stash! *~*Thanks for stopping by*~*
Mini Thank You Cards
Tuesday, March 27, 2012
I am very fortunate to work with some of the most wonderful people everyday! At the beginning of the year I wanted to show them how much I appreciate them, so I made these simple mini thank you cards. I really like making minis because they are super quick and I can make a bunch of them at one time.


* Mat ~ 3.25" x 3.25"
* Owl& Layers ~ Create-a-Critter ~ 2.75"
* Purple Ribbon ~ Offray
* Hero Arts ~ Everyday Sayings
* Brown Ink
* Spray Glitter
The owl doesn't really have a significance other than I thought he was cute and could represent how wise my fellow teachers are :) *~*Thanks for stopping by*~*


Cuts & Materials:
* Card Base ~ 3.5" x 7" (scored in half)* Mat ~ 3.25" x 3.25"
* Owl& Layers ~ Create-a-Critter ~ 2.75"
* Purple Ribbon ~ Offray
* Hero Arts ~ Everyday Sayings
* Brown Ink
* Spray Glitter
The owl doesn't really have a significance other than I thought he was cute and could represent how wise my fellow teachers are :) *~*Thanks for stopping by*~*
Smartie Pants
Saturday, March 24, 2012
I'm on a roll with posting here :) I took advantage of my spring break and decided to type several posts and schedule them for future posting times! Hopefully I can keep it up. I don't know about where you live, but here spring means state testing :( Our state just implemented a new test that will be used not only to measure how well our students read, but will also determine whether they move on to the next grade level. Needless to say, it has made things very stressful lately and unfortunately many of the students were stressed out too! I originally saw a post last year at Cricut Your Classroom with something very similar. I made 200ish of these (not just for my students, but for all of the third graders) to help ease their worries. On the back I wrote "We believe in you!" and the teacher's names with a white gel pen.


* Paper Studio Cardstock - Blue Variety Pack
* White Gel Pen
* Tag - "Do your best on the test SMARTIE PANTS!" Printed on the computer
* Smarties
I used the white gel pen to add some stitching and also traced the other cuts (pockets and zipper) the Cricut made to give them some dimension. After cutting the tags I printed, I framed them in more blue paper. I didn't measure either of them, but the font is Comic Sans 10 point. I think it really helped for the kids to know that we all believed in them and knew that they were going to do great! *~*Thanks for stopping by*~*


The Cuts & Materials:
* Pants - Everyday Paper Dolls - 9.5" (3.5" Real Dial Size)* Paper Studio Cardstock - Blue Variety Pack
* White Gel Pen
* Tag - "Do your best on the test SMARTIE PANTS!" Printed on the computer
* Smarties
I used the white gel pen to add some stitching and also traced the other cuts (pockets and zipper) the Cricut made to give them some dimension. After cutting the tags I printed, I framed them in more blue paper. I didn't measure either of them, but the font is Comic Sans 10 point. I think it really helped for the kids to know that we all believed in them and knew that they were going to do great! *~*Thanks for stopping by*~*
Valentine's Treats (better late than never)!
Friday, March 23, 2012
This post is a little later than I planned (since we are more than a month after Valentine's Day), but it is better late than never right! I made these cute Valentine's treats with my niece for her class. She wanted something a little different for the boys and the girls. I saw both of these ideas on Pinterest and decided to recreate them!


Cuts for the Superheroes:
* Cape ~ Paper Doll Dress Up ~ 5"
* Mask ~ Paper Doll Dress Up ~ 6.5"
* Diamond Shape ~Paper Doll Dress Up ~ 5.5"
Small hole punched in the cape for the sucker
Cuts for the Butterflies:
Created with 2 hearts welded on my Gypsy-
* Base (each heart) ~ Create-a-Critter ~ Real Height 2.8"
* Layer (each heart) ~ Create-a-Critter ~ Real Height 2.32"
Glued together and 2 slit cuts for the sucker
Other Materials:
* Paper Studio Paper
* Heart Punch for all of the hearts
* My Pink Stamper's - Happiest Moments (Happy Valentine's Day)
* My Pink Stamper's - Winter Treats & Sayings (to: & from:)
* Googly Eyes
* Silver Pipe Cleaners (butterflies only)
* Various Beads (butterflies only)
* Glue Dots (for Mask)
* Black Ink
I think they turned out pretty cute and her classmates loved them!
*~*Thanks for stopping by*~*
MIA & Permission Granted
Friday, March 2, 2012
Where does the time go? I apologize to all of my wonderful (and patient) followers for being MIA lately. I promise I haven't fallen off the face of the planet. Things have been super busy lately at home and at school. While I've had a bit of time to create lately, I haven't had much time to post anything! I will be posting some cute projects (including v-day gifts) soon, hopefully this weekend :) Until then though, I am letting everyone know that I am completely fine with my projects being pinned to Pinterest. I love all of the inspiration that can be found on Pinterest and would be honored to see my projects posted there as well! If you haven't already discovered Pinterest you must check it out! There are so many great ideas and it is super easy to use!!! Please be sure to check back soon for some great projects and as always *~* Thank you for stopping by *~*

Christmas Gift Card Holder
Monday, January 2, 2012
I hope that everyone had a fabulous Christmas and wonderful New Year's Day! I am finally getting the chance to post my Christmas projects. The first one is probably my favorite! I made these fun gift card holders for my friends and family.


* Cut 1 stocking (same size) on designer paper.
* Cut stocking layers at w-3.32", h-5.5".
* Cut off the top of 1 cardstock stocking (this will be the back).
* Use a circle punch (I used the 3/4" Stampin' Up punch) to cut a half circle in the stocking you just cut the top off of. This will make it easier to get the gift card in and out.
* Put glue on just the edges (so the gift card can slide in and out)of the 2 cardstock stockings (one of which you cut and punched) and stick them together.
* Glue the stocking cut from designer paper on the front.
* Stamp your desired saying on the back (I chose "a gift for you" from Hero Arts - Holiday Sayings and "to:/from:" from Close to My Heart - Celebrations)
* Emboss the stocking layers (I used d'vine swirls) to give them texture.
* Glue the layers on the stocking (tip-put glue on the stocking part to avoid pressing the embossing back in).
* Punch a hole in top corner and set an eyelet (I used my crop-a-dile) to string a ribbon through.
* String a ribbon and tie a knot in it.


Here's how I did it:
* Cut 2 stockings from Art Philosophy (you could use any cartridge or the die from Stampin' up) at w- 4" ,h- 5.25" (changed the width and height on my Gypsy)on any color cardstock (I used white so I could stamp on the back).* Cut 1 stocking (same size) on designer paper.
* Cut stocking layers at w-3.32", h-5.5".
* Cut off the top of 1 cardstock stocking (this will be the back).
* Use a circle punch (I used the 3/4" Stampin' Up punch) to cut a half circle in the stocking you just cut the top off of. This will make it easier to get the gift card in and out.
* Put glue on just the edges (so the gift card can slide in and out)of the 2 cardstock stockings (one of which you cut and punched) and stick them together.
* Glue the stocking cut from designer paper on the front.
* Stamp your desired saying on the back (I chose "a gift for you" from Hero Arts - Holiday Sayings and "to:/from:" from Close to My Heart - Celebrations)
* Emboss the stocking layers (I used d'vine swirls) to give them texture.
* Glue the layers on the stocking (tip-put glue on the stocking part to avoid pressing the embossing back in).
* Punch a hole in top corner and set an eyelet (I used my crop-a-dile) to string a ribbon through.
* String a ribbon and tie a knot in it.


I used Art Philosophy (my new favorite cartrige!) for the stocking, but you could use any cartridge with a stocking cut or even a stocking die. These not only made cute gift card holders, but adorable ornaments too! I hung them I my tree until it was time to give them away. I hope you enjoy them as much as I do. I plan to post my other Christmas cards soon, so be sure to watch for them! *~*Thanks for stopping by*~*
Simple Masculine Birthday Card
Friday, December 23, 2011
Oh my did the holidays sneak up on me! Things have been super busy in life in general. I apologize (and thank them for not giving up on me) to all of my followers for not having the time to post more often. I do have several Christmas cards/projects to post, so be watching for those soon. Today I am posting a super simple (& Cricutless!) birthday card that I made for my wonderful dad. I don't know about everyone else, but I have a hard time making masculine cards (I think it is my love of all things sparkly that gets in the way!). I got the idea from a Christmas card I saw at Vicki at WizarHd's Hangout.

Materials
* Card Base: 8.5" x 5.5"
* Chocolate Brown Mat: 3.75" x 5" (Paper Studio)
* Light Brown Mat: 3.5" x 4.75" (Creative Memories)
* Orange Polka Dots: 1" x 2.5" (Boxer Paper)
* Green Polka Dots: 1" x 2" (Boxer Paper)
* Blue Polka Dots: 1" x 1.5" (Boxer Paper)
* Scrap White Paper 3" x 2.5"
* Cut Both Mats and glue to the card base.
* Cut each present piece and glue them, stacked on top of each to the scrap white paper.
* Tape the ribbon to the present piece and tie a bow.
* Glue the present to the card
* Stamp Happy Birthday ( from CTMH Celebrations with Momentos ink)
I wish the stamp would have stamped a bit better, but overall I think it turned out really well! I'd love to hear your feed back of course. I hope that everyone has a wonderful Christmas and a Happy New Year's! *~*Thanks for Stopping By*~*

Here's how it is made:
Materials
* Card Base: 8.5" x 5.5"
* Chocolate Brown Mat: 3.75" x 5" (Paper Studio)
* Light Brown Mat: 3.5" x 4.75" (Creative Memories)
* Orange Polka Dots: 1" x 2.5" (Boxer Paper)
* Green Polka Dots: 1" x 2" (Boxer Paper)
* Blue Polka Dots: 1" x 1.5" (Boxer Paper)
* Scrap White Paper 3" x 2.5"
Steps
* Cut the card base and score in half.* Cut Both Mats and glue to the card base.
* Cut each present piece and glue them, stacked on top of each to the scrap white paper.
* Tape the ribbon to the present piece and tie a bow.
* Glue the present to the card
* Stamp Happy Birthday ( from CTMH Celebrations with Momentos ink)
I wish the stamp would have stamped a bit better, but overall I think it turned out really well! I'd love to hear your feed back of course. I hope that everyone has a wonderful Christmas and a Happy New Year's! *~*Thanks for Stopping By*~*
Halloween Treats!
Sunday, October 30, 2011
Halloween has always been a special holiday to me since my birthday is just the day before. I had so much fun making these treat bags for all of the kiddos in our family!


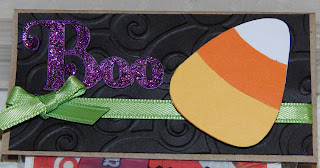


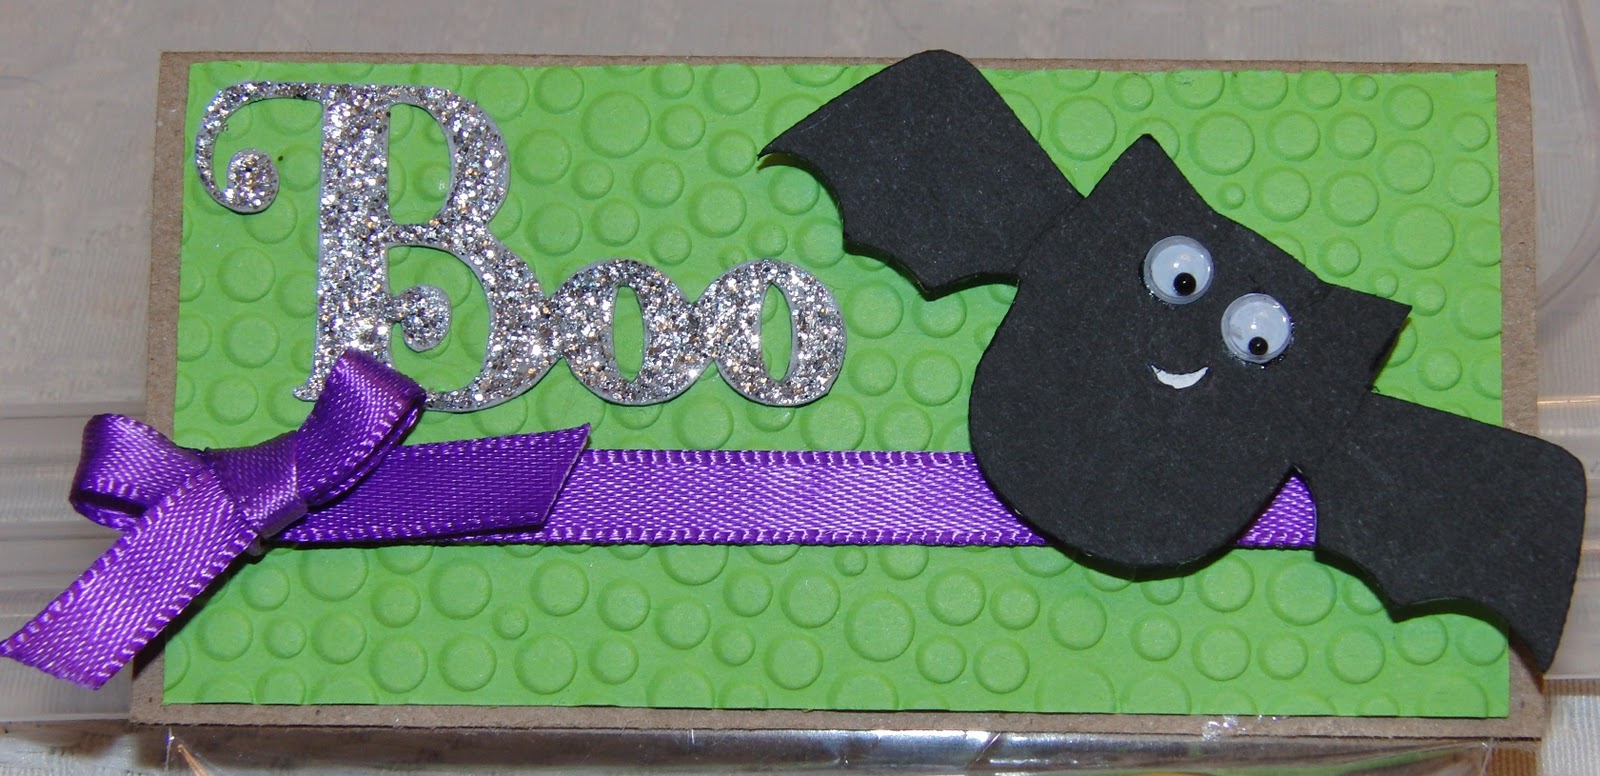
 Making these treat bags was super easy. I purchased the plastic bags themselves from Hobby Lobby (with a 40% off coupon of course!). I cut kraft cardstock 4" x 4" and scored it at 2". I folded and stapled it to the bag. Then I cut a colored piece of cardstock (all from the paper studio) at 2 7/8" x 3 7/8" and embossed it (using a variety of folders) with my Cuttlebug. I attached ribbon and tied a bow, then glued it to the kraft cardstock. I welded and sized letters from the Stork's Delivery Cartridge on my Gypsy to make the word "Boo". I also cut a variety Halloween shapes from different cartridges to add to the tags. I used my Gypsy to size them as well. Last, but not least, I added a variety of sparkle using a stardust gel pen and glitter glue. I think they turned out great and I hope the kids love them just as much :) Happy Halloween! *~*Thanks for Stopping By*~*



Baby Card
Wednesday, October 26, 2011
I had a fabulous fall break last week! My wonderful grandparents came to the Midwest (all the way from the East Coast) to surprise us! It was great to see and spend time with them! I miss them already :( I'm back this week with an adorable card to welcome a little one into this world and congratulate his parents.


 Here are the details:
* Card Base: Paper Studio Cardstock - 5.5" x 4.25"
* Designer paper: DCWV Chistmas Stack - 5 3/8" x 4 1/8"
* Gray Mat: Paper Studio Cardstock - 4 7/8" x 3 5/8"
* Dark Blue Mat: Paper Studio Cardstock - 4.75" x 3.5" - Embossed with Cuttlebug Polka Dot Folder
* Stork - Stork's Delivery Cartridge - 3.75" - DCWV Christmas Glitter Stack & Paper Studio Cardstock
* Ribbon - Joann Fabrics - Essentials (I think)
* Stamp - Cloud 9 Simple Thoughts Baby
I posted a couple of different pictures in hope that you would be able to see the sparkle and colors well enough. I also thought about stamping congratulations on the front, but couldn't find a place without it looking overly cluttered. All in all I think it turned out really cute! I still have several more cards to post - so be sure to stop back in a few days. Thanks again to all of my followers :) I appreciate all of your wonderful comments and support. My blog would be nothing without you! *~*Thanks for stopping by*~*


* Card Base: Paper Studio Cardstock - 5.5" x 4.25"
* Designer paper: DCWV Chistmas Stack - 5 3/8" x 4 1/8"
* Gray Mat: Paper Studio Cardstock - 4 7/8" x 3 5/8"
* Dark Blue Mat: Paper Studio Cardstock - 4.75" x 3.5" - Embossed with Cuttlebug Polka Dot Folder
* Stork - Stork's Delivery Cartridge - 3.75" - DCWV Christmas Glitter Stack & Paper Studio Cardstock
* Ribbon - Joann Fabrics - Essentials (I think)
* Stamp - Cloud 9 Simple Thoughts Baby
I posted a couple of different pictures in hope that you would be able to see the sparkle and colors well enough. I also thought about stamping congratulations on the front, but couldn't find a place without it looking overly cluttered. All in all I think it turned out really cute! I still have several more cards to post - so be sure to stop back in a few days. Thanks again to all of my followers :) I appreciate all of your wonderful comments and support. My blog would be nothing without you! *~*Thanks for stopping by*~*
Another wedding card!
Monday, October 17, 2011
I'm back again with another wedding card! This one was for a wonderful new friend who just got married in September. I love that there are images on my seasonal cartridges that I can use for other occasions as well! For this one I used the doves (which I also used for a wedding card here) from Joys of the Season.
 I started by welding the hearts (cut at 5.5 "from the Create-a-Critter poodle) on my Gypsy. Then I cut the same heart at 5" to layer on the top. I embossed it with the Cuttlebug Polka Dots folder. The doves are from Joys of the Season cartridge cut at 2.75". The stamp is part of the Hero Arts - Everyday Sayings set (one of my most used stamp sets because of it's versatility!). The ribbon is just from Offray and all of the paper is by The Paper Studio. Lastly (but certainly not least!) the sparkle on the doves is Tulip fabric paint and the gems are from the Michaels $ spot.
Thanks again to all of my fabulous followers for sticking it out during this super busy time in my life! I love you support and reading everyone of your comments. I've been super busy making cards lately and I'll be sure to get them posted very soon! *~*Thanks for stopping by*~*

Thanks again to all of my fabulous followers for sticking it out during this super busy time in my life! I love you support and reading everyone of your comments. I've been super busy making cards lately and I'll be sure to get them posted very soon! *~*Thanks for stopping by*~*
A long awaited wedding card
Monday, October 10, 2011
Where does the time go? I am still alive, just super busy! I am so sorry to all of my followers and so thankful that I have so many that have not given up on me! I have been getting cards completed (slowly) so I am definitely going to be more dedicated to making time for posting them :) This card was made for a bridal shower. The bride had chosen silver and pink as her colors so I really wanted to be sure to incorporate both.

 This was a very simple card to make. The card base is a 5.5" x 4.25". The designer paper (by The Paper Studio) and the white cardstock are both cut at 4" x 2 5/8". The top is embossed with the Cuttlebug Kimmy Luvs (UK - purchased from cropstop.com) folder. The silver ribbon is from Offray. The gems are from the Michael's dollar spot. I welded letters from the Gypsy Font cartridge to create the "Mr. & Mrs.". Of course there's a bit of glitter - Tulip glitter fabric paint on the letters. I think it turned out beautifully, but I'd love to hear what you think! I do have another wedding card and some adorable thank you cards to post and I promise you will hear from me before this time next week! I totally appreciate all of my followers :) As always - *~*Thanks for stopping by*~*


I'm linking this up to:
And the winner is...
Monday, September 12, 2011
Thank you so much to all of those who participated in Back to School / Fall blog hop! It was so much fun and I loved seeing all of the inspiring projects. And a big thanks to Sylvia at Bella's Scrapbook Design for inviting me to be a part of such an amazing line up. I'm so excited to have so many new followers as well as those fabulous blog friends who follow me daily! I received 48 sparkly comments! Lucky for me random.org does the choosing :)

Babe - you've got mail! Please contact me back with your info and I will get your goodies in the mail. If I don't hear from you within one week I will sadly have to chose someone else :( I'll be back again in a few days to post a sparkly wedding card I just made. Be sure to check back! *~*Thanks for stopping by*~*
and the winner is...

Babe O'mara said, "Your card is adorable. Love the glittery crayons.
And what a cute idea for the hall passes. TFS"
Babe - you've got mail! Please contact me back with your info and I will get your goodies in the mail. If I don't hear from you within one week I will sadly have to chose someone else :( I'll be back again in a few days to post a sparkly wedding card I just made. Be sure to check back! *~*Thanks for stopping by*~*
Back to School / Fall Blog Hop
Saturday, September 10, 2011
Welcome to the Back to School / Fall Blog Hop. You should have come here from Monica at Simply Cricutting (aren't her project simply amazing?). If you were just visiting my blog today, make sure that you go back to the beginning Bella's Scrapbook Designs. You don't want to miss any of the incredible projects or blog candy! Being a teacher myself, I love making projects for my fellow teachers. This card was made for a fabulous friend who just got her first teaching position this year.

What I used:
* Base - Red Cardstock 8.5" x 5.5" - scored in half* Mat - DCWV Grade School Stack 4" x 5.25:
* Black Strip - 1.125" x 4"
* White Strip - 1.25" x 4"
* Red Strip - 2" - Trimmed with Fiskars Border Punch
* Green Ribbon
* White Heat Embossing Powder
* Paper Studio Gems (silver)
* Michaels $1 Gems (red)
* Target $1 Glitter
* TPC Studio - Greetings Stamp Set - "Congrats!"
Cut:
Crayons - Simply Charmed - 3.25"I also made these fun hall passes for a friend who has a beach theme this year.

Unfortunately, I didn't write down all of the measurements. I used my gypsy to make the pass part and Gypsy Font (welded) to make the words. The flowers and the flip flops are from Life's a Beach and the palm tree is from Create-a-Critter!
Thank you so much for hopping with us today. Next up is Christy from Christy's Scrapbookin'. I'm sure she has something spectacular for you. Before you go don't forget to check out my blog candy at the bottom of this post :)
Thank you so much for hopping with us today. Next up is Christy from Christy's Scrapbookin'. I'm sure she has something spectacular for you. Before you go don't forget to check out my blog candy at the bottom of this post :)
Lost? Don't worry - Here's the whole line up:
* Sylvia- http://www.bellascrapbookdesigns.blogspot.com/* Sherri- http://www.sherriescraps.blogspot.com/
* Sandy S- http://www.thecraftycreationspot.blogspot.com/
* Jenny- http://www.jennyplace26.blogspot.com/
* Anita- http://www.anitaandbugs.blogspot.com/
* Jenny- http://www.jennyplace26.blogspot.com/
* Anita- http://www.anitaandbugs.blogspot.com/
* Patty- http://www.creativediva98.blogspot.com/
* Tiffany- http://www.sparkledmemories.blogspot.com/
* Christy- http://www.christysscrappin.blogspot.com/
* Nicole- http://www.teachdanz.blogspot.com/
* PeggySue- http://www.icrea8cards.blogspot.com/
* Laura- http://www.sunflowercreations9530.blogspot.com/
 What's a blog hop with out some magnificent blog candy? I'm offering this blog candy to one lucky commenter. As usual, I tried to match our school theme. I had a hard time not keeping these for myself! Also, I didn't forget the sparkle - I just don't know what it will be yet. So a sparkle surprise will be included in the winners package :) Want to win? All you have to do is leave a comment on this post. You don't have to be a follower, but of course I would love it if you were :) Be sure to leave a way for me to contact you, in case you win! I will use random.org to choose a winner on Monday, September 12th. *~* Thanks for stopping by*~*

Subscribe to:
Posts (Atom)


