Birthday Card

Tuesday, April 10, 2012

Back again!  Hopefully everyone had a wonderful Easter!!! I love this time of year with all of the flowers starting to bloom and the weather getting warmer. On to the card...

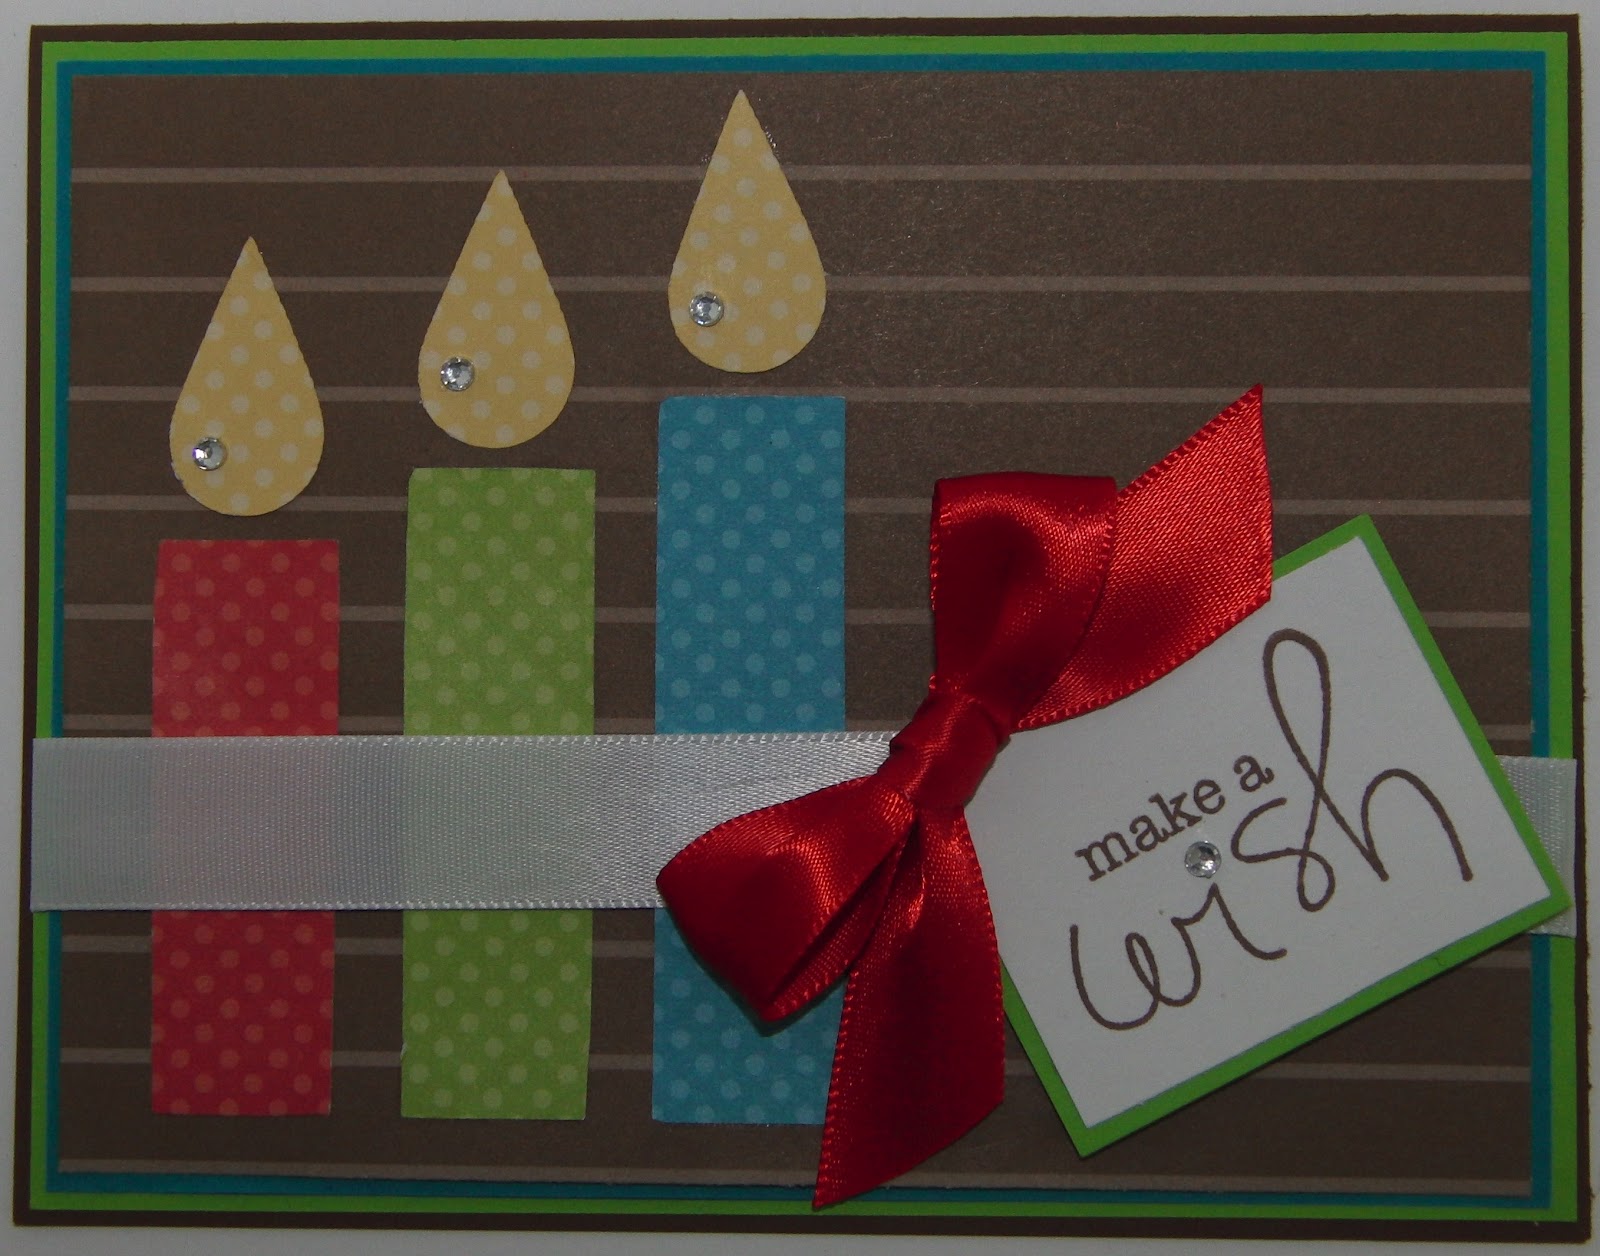
This is another card that my sister and I made for her to raise money for March of Dimes.  These were a big hit - partially because of the versatility that they have.  They could be used for males or females, children or adults.  They're perfect for everyone!

A not so spectacular picture again!

I originally saw a card like this at Inking it Up Crazy with Kassidy.  I think her's is much cuter, as we didn't have time to do any doodling, but it still turned out pretty cute!

Here's how I made it:
* Card Base - Art Philosophy - Real Dial Size 4.25"
* Card Mat (green) - Art Philosophy - 4"
* Card Mat (white) - 3.5"- embossed with Cuttlebug Spots and Dots
* Hat - Stork's Delivery - 3" (trimmed off the bottom part)
* Stampendous Birthday Assortment Stamp Set
* Paper Studio Gem
* Art Deco Glitter Paint
* Momento Black Ink
* Offray Orange Ribbon
* Scraps of Blue and White Paper
**All paper is by The Paper Studio**

I used the Art Deco Glitter Paint (I mentioned in my last post) on this one too.  I think you might be able to see it in this project.I love the different card choice on the Art Philosophy Cartridge.  I will be back again in a few days with another wonderful card, so be sure to check back!  *~*Thanks for stopping by*~*


Baby Shower Banner

Friday, April 6, 2012

I have seen these banners all over Pinterest and have been dying for an occasion to make one! I finally got the opportunity to do so for my friends baby shower.  I had a really hard time finding measurements, so below you will find the exact cuts I made. I think they are perfect for decorating all kinds of celebrations!

Sorry for the slightly blurry picture!

Here's What I Used:
* Scallop Base - Art Philosophy - 5"

* Circle Mat - Art Philosophy - 4"
* Letters -Hello Kitty Font - 2.5"
* Paper Flowers
* Offray Ribbon
* Deco Art Glitter Paint
* All Paper Studio Papers

You'll notice that above I listed using Deco Art Glitter Paint (you can't see it in the pictures, but I used it on the letters).  I first saw this at Peachy Keen Stamps (while ordering a set of their wonderful face stamps!) and was very intrigued.  This was the first project I ever used it on (I've used it on others since) and I absolutely love it!  It turns any paper into glitter paper and is super easy to paint on. I highly recommend it, if you are looking for a great way to add some sparkle.  I hope I hope I have inspired you to go out there and decorate your next party with one of these super cute banners.  I'll be back again in a few days! *~*Thanks for stopping by*~* 

I'm Linking this up to:
 Decorate To Celebrate! 
 

A Cricutless Thank You!

Wednesday, April 4, 2012

I know I said I had a banner to show you in this post, but I changed my mind!  The banner will be in the next one :) It isn't often any more that I make a completely Cricutless project, but recently I have created two thank you cards (one posted here and the other one to come in the future) without my Cricut! I sometimes have a hard time making thank you cards because I can never decide on a cuts to use, unless I have a specific person/purpose in mind. Therefore, it takes me forever when I do make them, so Cricutless tends to be a bit quicker. This one is a card that my sister and I made for her to sell in order to raise money for March of Dimes.
Here's how I did it:* Card Base - 5.5" x 8.5" (scored at 4.25")
* Card Mat - 5.25" x 4.25" (trimmed with Fiskars Treading Water Border Punch)
* Pattern Mat - 5" x 3"
* Offray Brown Ribbon
* Hero Arts Everyday Sayings Stamp Set
* Brown Momento Ink


This card is super simple to make. I chose earth tones to make it more gender neutral (even though it has a bow). I really liked how it turned out and how quick it was to make. I plan to make some more for my stash using other color combinations and pattern papers.  I will be back in a few days with a banner I made (my first ever) for a baby shower. *~*Thanks for stopping by*~*

Make a Wish!

Monday, April 2, 2012

Hopefully everyone had a fabulous weekend and April Fool's Day! I originally saw a birthday card by The Artistic Avenger and immediately knew I wanted to recreate it.  I love that it is gender neutral (even with a little bit of sparkle!). The only problem was that it was made with all Stampin' Up products. I had to substitute a few materials and use my gypsy to create it.
Still working on my picture taking - hence the 2 pictures!

How I made it:
* Card Base (brown) - 8 1/2" x 5 1/2" (scored at 4 1/4")
* Card Mat (green) - 5 3/8" x 4 1/8"
* Card Mat (blue) - 5 1/4" x 4"
* Pattern Mat - 5 1/8" x 3 7/8" - Target $ Spot
* Small Candle - Any Rectangle Cut - .75" x 2"
* Medium Candle - Any Rectangle Cut - .75" x 2.15" 
* Large Candle - Any Rectangle Cut - .75" x 2.30"
* Flame - Art Philosophy - 1"
* Offray 5/8" White & Red Ribbon
* Make a Wish Stamp - Joann Fabrics $1 Spot
* Momento Brown Ink
* The Paper Studio Gems
* All Other Paper and Cardstock is by The Paper Studio

I had to use my gypsy to size the candles and actually cut the rectangles. I think it turned out wonderfully and very similar, even though I didn't use the same supplies.  The colors could also be changed very easily if you wanted to change it up some. I'll be back in a few days with a super cute banner - so be sure to check back! *~*Thanks for stopping by*~*