Simple Masculine Birthday Card

Friday, December 23, 2011

Oh my did the holidays sneak up on me!  Things have been super busy in life in general.  I apologize (and thank them for not giving up on me) to all of my followers for not having the time to post more often.  I do have several Christmas cards/projects to post, so be watching for those soon.  Today I am posting a super simple (& Cricutless!) birthday card that I made for my wonderful dad.  I don't know about everyone else, but I have a hard time making masculine cards (I think it is my love of all things sparkly that gets in the way!).  I got the idea from a Christmas card I saw at Vicki at WizarHd's Hangout.

Here's how it is made:

Materials
* Card Base: 8.5" x 5.5"
* Chocolate Brown Mat: 3.75" x 5" (Paper Studio)
* Light Brown Mat: 3.5" x 4.75" (Creative Memories)
* Orange Polka Dots: 1" x 2.5" (Boxer Paper)
* Green Polka Dots: 1" x 2" (Boxer Paper)
* Blue Polka Dots: 1" x 1.5" (Boxer Paper)
* Scrap White Paper 3" x 2.5"

Steps
* Cut the card base and score in half.
* Cut Both Mats and glue to the card base.
* Cut each present piece and glue them, stacked on top of each to the scrap white paper.
* Tape the ribbon to the present piece and tie a bow.
* Glue the present to the card
* Stamp Happy Birthday ( from CTMH Celebrations with Momentos ink)

I wish the stamp would have stamped a bit better, but overall I think it turned out really well!  I'd love to hear your feed back of course.  I hope that everyone has a wonderful Christmas and a Happy New Year's! *~*Thanks for Stopping By*~*

Halloween Treats!

Sunday, October 30, 2011

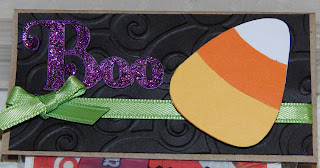
Halloween has always been a special holiday to me since my birthday is just the day before.  I had so much fun making these treat bags for all of the kiddos in our family!
Making these treat bags was super easy.  I purchased the plastic bags themselves from Hobby Lobby (with a 40% off coupon of course!). I cut kraft cardstock 4" x 4" and scored it at 2". I folded and stapled it to the bag.  Then I cut a colored piece of cardstock (all from the paper studio) at 2 7/8" x 3 7/8" and embossed it (using a variety of folders) with my Cuttlebug.  I attached ribbon and tied a bow, then glued it to the kraft cardstock. I welded and sized letters from the Stork's Delivery Cartridge on my Gypsy to make the word "Boo".  I also cut a variety Halloween shapes from different cartridges to add to the tags.  I used my Gypsy to size them as well. Last, but not least, I added a variety of sparkle using a stardust gel pen and glitter glue.  I think they turned out great and I hope the kids love them just as much :)  Happy Halloween! *~*Thanks for Stopping By*~*

Baby Card

Wednesday, October 26, 2011

I had a fabulous fall break last week!  My wonderful grandparents came to the Midwest (all the way from the East Coast) to surprise us!  It was great to see and spend time with them!  I miss them already :( I'm back this week with an adorable card to welcome a little one into this world and congratulate his parents.
 Here are the details:
* Card Base: Paper Studio Cardstock - 5.5" x 4.25"
* Designer paper: DCWV Chistmas Stack - 5 3/8" x 4 1/8"
* Gray Mat: Paper Studio Cardstock - 4 7/8" x 3 5/8"
* Dark Blue Mat: Paper Studio Cardstock - 4.75" x 3.5" - Embossed with Cuttlebug Polka Dot Folder
* Stork - Stork's Delivery Cartridge - 3.75" - DCWV Christmas Glitter Stack & Paper Studio Cardstock
* Ribbon - Joann Fabrics - Essentials (I think)
* Stamp - Cloud 9 Simple Thoughts Baby
I posted a couple of different pictures in hope that you would be able to see the sparkle and colors well enough. I also thought about stamping congratulations on the front, but couldn't find a place without it looking overly cluttered. All in all I think it turned out really cute! I still have several more cards to post - so be sure to stop back in a few days. Thanks again to all of my followers :)  I appreciate all of your wonderful comments and support.  My blog would be nothing without you!  *~*Thanks for stopping by*~*

Another wedding card!

Monday, October 17, 2011

I'm back again with another wedding card!  This one was for a wonderful new friend who just got married in September.  I love that there are images on my seasonal cartridges that I can use for other occasions as well!  For this one I used the doves (which I also used for a wedding card here) from Joys of the Season.
 
I started by welding the hearts (cut at 5.5 "from the Create-a-Critter poodle) on my Gypsy.  Then I cut the same heart at 5" to layer on the top.  I embossed it with the Cuttlebug Polka Dots folder. The doves are from Joys of the Season cartridge cut at 2.75".  The stamp is part of the Hero Arts - Everyday Sayings set (one of my most used stamp sets because of it's versatility!). The ribbon is just from Offray and all of the paper is by The Paper Studio.  Lastly (but certainly not least!) the sparkle on the doves is Tulip fabric paint and the gems are from the Michaels $ spot.

Thanks again to all of my fabulous followers for sticking it out during this super busy time in my life! I love you support and reading everyone of your comments.  I've been super busy making cards lately and I'll be sure to get them posted very soon!  *~*Thanks for stopping by*~*

A long awaited wedding card

Monday, October 10, 2011

Where does the time go?  I am still alive, just super busy!  I am so sorry to all of my followers and so thankful that I have so many that have not given up on me!  I have been getting cards completed (slowly) so I am definitely going to be more dedicated to making time for posting them :) This card was made for a bridal shower.  The bride had chosen silver and pink as her colors so I really wanted to be sure to incorporate both.
This was a very simple card to make.  The card base is a 5.5" x 4.25".  The designer paper (by The Paper Studio) and the white cardstock are both cut at 4" x 2 5/8". The top is embossed with the Cuttlebug Kimmy Luvs (UK - purchased from cropstop.com) folder.  The silver ribbon is from Offray. The gems are from the Michael's dollar spot.  I welded letters from the Gypsy Font cartridge to create the "Mr. & Mrs.".  Of course there's a bit of glitter - Tulip glitter fabric paint on the letters.  I think it turned out beautifully, but I'd love to hear what you think!  I do have another wedding card and some adorable thank you cards to post and I promise you will hear from me before this time next week! I totally appreciate all of my followers :) As always - *~*Thanks for stopping by*~*

I'm linking this up to:

And the winner is...

Monday, September 12, 2011

Thank you so much to all of those who participated in Back to School / Fall blog hop! It was so much fun and I loved seeing all of the inspiring projects.  And a big thanks to Sylvia at Bella's Scrapbook Design for inviting me to be a part of such an amazing line up. I'm so excited to have so many new followers as well as those fabulous blog friends who follow me daily! I received 48 sparkly comments! Lucky for me random.org does the choosing :)
and the winner is...
Babe O'mara said, "Your card is adorable. Love the glittery crayons. 
And what a cute idea for the hall passes. TFS"

Babe - you've got mail! Please contact me back with your info and I will get your goodies in the mail.  If I don't hear from you within one week I will sadly have to chose someone else :(  I'll be back again in a few days to post a sparkly wedding card I just made. Be sure to check back! *~*Thanks for stopping by*~*

Back to School / Fall Blog Hop

Saturday, September 10, 2011

Welcome to the Back to School / Fall Blog Hop. You should have come here from Monica at Simply Cricutting (aren't her project simply amazing?). If you were just visiting my blog today, make sure that you go back to the beginning Bella's Scrapbook Designs.  You don't want to miss any of the incredible projects or blog candy!  Being a teacher myself, I love making projects for my fellow teachers.  This card was made for a fabulous friend who just got her first teaching position this year.
What I used:
* Base - Red Cardstock 8.5" x 5.5" - scored in half
* Mat - DCWV Grade School Stack 4" x 5.25:
* Black Strip - 1.125" x 4"
* White Strip - 1.25" x 4"
* Red Strip - 2" - Trimmed with Fiskars Border Punch
* Green Ribbon
* White Heat Embossing Powder
* Paper Studio Gems (silver)
* Michaels $1 Gems (red)
* Target $1 Glitter
* TPC Studio - Greetings Stamp Set - "Congrats!"

Cut:
Crayons - Simply Charmed - 3.25"

I also made these fun hall passes for a friend who has a beach theme this year. 
Unfortunately, I didn't write down all of the measurements.  I used my gypsy to make the pass part and Gypsy Font (welded) to make the words.  The flowers and the flip flops are from Life's a Beach and the palm tree is from Create-a-Critter!

Thank you so much for hopping with us today.  Next up is Christy from Christy's Scrapbookin'.  I'm sure she has something spectacular for you.  Before you go don't forget to check out my blog candy at the bottom of this post :)

Lost?  Don't worry - Here's the whole line up: 
* Sylvia- http://www.bellascrapbookdesigns.blogspot.com/
* Patty- http://www.creativediva98.blogspot.com/
* Laura- http://www.sunflowercreations9530.blogspot.com/
What's a blog hop with out some magnificent blog candy?  I'm offering this blog candy to one lucky commenter.  As usual, I tried to match our school theme. I had a hard time not keeping these for myself! Also, I didn't forget the sparkle - I just don't know what it will be yet.  So a sparkle surprise will be included in the winners package :) Want to win? All you have to do is leave a comment on this post.  You don't have to be a follower, but of course I would love it if you were :)  Be sure to leave a way for me to contact you, in case you win! I will use random.org to choose a winner on Monday, September 12th.  *~* Thanks for stopping by*~*

Awards & A Blog Hop Announcement

Thursday, September 8, 2011

First I'd like to apologize to all of my wonderful friends and followers who have stuck by me through this super busy time in my life.  Every week I pledge to make more time to craft and every week it seems like I don't have the time to do so!  But don't fret... I was super busy over the long weekend and completed 3 whole cards :)  The first will be seen Saturday Sept. 10th for the Back to School/Fall Hop hosted by Sylvia at Bella's Scrapbook Designs!  Now on to my award... 
I am super honored to have received the Butterfly Award from Jen at Jen's Happy Place.  If you haven't been to visit Jen, be sure you do - she makes super cute projects :) To receive this award, I need to: answer the following questions, award it to 10 other bloggers, contact the 10 bloggers to let them know they have been given this award, and I also need to show a link to the person who gave me the award.

Here are the questions with my answers:

Q1) Name your favorite color.
Purple and red

Q2) Name your favorite song.
I can’t decide – I like all kinds of music and my favorite is always changing

 Q3) Name your favorite dessert.
Strawberries and Chocolate Chip Cookies (not together)
 
Q4) What wizzes you off at the moment?
Not having enough time to make more cards

Q5) Your favorite pet?
Molly my dog and Rascal my cat

Q6) Black or White?
Both- I really like black and white patterns right now!

Q7) Your biggest fear?
Spiders – anything that has 8 legs is just creepy

Q8) Best Feature?
My sense of humor

Q9) Everyday attitude?
Positive and upbeat

Q10) What is perfection?
It is what you make it

Q11) Guilty Pleasure?
Buying teaching and crafting supplies

Q12) When you're upset you . . .
Craft of course!

Now to pass it on to my blog friends!  I tried to choose people who I didn’t think had already received this award…

I'm off to let these fabulous ladies that I am passing this award to them.  I suggest you hop along and visit them too.  I promise you won't be disappointed! Don't forget to come back on Saturday for the wonderful Back to School/Fall hop - there will be some spectacular projects and I am sure some magnificent blog candy :) *~*Thanks for stopping by*~*

Baby Card (finally!)

Saturday, August 20, 2011

Long time no post!  It is so easy to forget how busy the first few weeks of school can be, but it is great to be back in the swing of things and meet all of the new kiddos!  Now on to the long awaited baby card...
 
This card was for a wonderful couple of friends who just had a beautiful baby girl! This is a standard 4.25" x 5.5".  The pink mat is 4" x 5.25" and is embossed with my Seeing Spots Cuttlebug folder. All of the paper, the buttons and the gems (except the large one on the button is from Michaels $ spot) are from The Paper Studio.  The ribbon is from Offray and for a little extra sparkle I used Tulip glitter on the bottle cap.
The Cuts:
*Ellie - Hello Kitty Font @ 1.5" (welded w/Gypsy)
*Bottle - Doodlecharms @ 2.5"
I was ecstatic to catch Menard's Cricut Cartridge sale!  I was able to grab four cartridges on my list.  I got Sweet Treats, My Community, Locker Talk and Stretch Your Imagination all for $5 (after a mail in rebate which I was sure to mail right away)! I'm so excited to start using them - so be sure to check back for new projects using them! Thanks so much to all of my followers for not giving up on me during this super busy time in my life! *~*Thanks for stopping by*~*

I'm linking this up to:

Simple Thank You Cards and More Awards?

Sunday, July 31, 2011

So sorry for the delay in posting!  My husband and I decided to take a spontaneous trip :)  He asked where I wanted to go and (being the animal lover I am) I said the zoo.  So instead of going to our local zoo, we ventured to the one in Columbus, OH.  With only one week left until school starts again, it was fun to get away! Now I bring to you some simple thank you cards I made.  You won't see a whole lot of sparkle here because these weren't cards for my own collection. I made them for someone else to use and let's face it not everyone loves sparkle as much as I do :)  

Materials for this card:
Card Base - 4.25" x 5.5"
Smaller Paper Strip - 1"
Larger Paper Strip - 1.25"
Blue Ribbon
3 Gems from The Paper Studio
Spots and Dots Embossing Folder
"Heartfelt Thanks" from Inkadoo Thank You Words
Chocolate brown Ink
All of the paper is from The Paper Studio

The Cut:
Bird - Create-a-Critter - 3.75"

I am honored to once again receive some amazing awards!  I am so thankful to have so many wonderful blog friends and I appreciate each and everyone of you :)  
 

I want to sincerely thank:
Lisa at A Mermaid's Crafts for: Thing of Beauty Award, Best Friend Blogger Award, Cricut-tastic Award, Stinkin' Cute Award & Stylish Blogger Award, Irresistibly Sweet Blog Award.

Karen at Kaleidoscope Sparkles for: Thing of Beauty Award, Best Friend Blogger Award, Cricut-tastic Award, Stinkin' Cute Award, Stylish Blogger Award (I posted some of these last time, but still haven't had the time to update them).  

Please visit both of these wonderful ladies.  They are both incredibly sweet and make beautiful projects.  I promise you won't be disappointed!  I will update this post with the rules for these amazing awards and the blogs I am passing them on to in a few days.  I'm still working on a baby card too.  So be sure to check back!  *~*Thanks for stopping by*~*

I'm linking this up to:

A winner and more awards!

Monday, July 25, 2011

Thank you so much to all of those who participated in Christmas in July the hop! It was so much fun and I can't wait to get started on the rest of my Christmas cards.  I'm so excited to have so many new followers as well as those wonderful blog friends who follow me daily! I received 51 sparkly comments (but some of them were duplicated commenters). Lucky for me random.org does the choosing :)

and the winner is...
Shirley from Look at My Cute Stuff said, "Thanks for saying my blog 
has cute stuff!! lol Your card is really cute, I love the sparkle!! 
I am having so much fun with this blog hop!!"

Shirley - you've got mail! Please contact me back with your info and I will get your goodies in the mail.  If I don't hear from you within one week I will sadly have to chose someone else :( Also, if you haven't been to visit Shirley be sure to drop by her blog and leave her some love.  She really does make cute stuff and you wont be disappointed!

I also have been honored with some more amazing awards.  One of my sweetest blog friends Karen at Kaleidoscope Sparkles, has kindly given me the following three awards:


Thank you so much Karen!  Please also visit Karen and see all of her sparkly creations :) I'll update this post in a few days with the rules and bloggers I am passing them on to.  I'm  also working on some thank you cards and an adorable baby card that I will be posting soon.  So be sure to check back!  *~*Thanks for stopping by*~*

Christmas in July Blog Hop

Friday, July 22, 2011

Welcome to the Christmas in July Blog Hop - where we are celebrating Christmas a little bit early . You should have come here from Shirley at Look at My Cute Stuff  (she really does have cute stuff don't you think?). If you were just visiting my blog today, make sure that you go back to the beginning at Expressions by Elaine.  You don't want to miss any of the amazing projects or blog candy!  
I love Chirstmas so this project was so much fun for me (plus it really helped me keep my mind off the super hot weather here) :) I also used this card as a fair project in our local county fair.  This was my first time entering projects and this one won champion!  My other projects both got blue star ribbons (first place with consideration for champion).  Anyway back to my project...
For this card I cut a dark green piece of cardstock to 8.5" x 5.5" and scored it at 4.25". The pattern paper (from DCWV - The Christmas Combo Stack) is 4" x 5.25" with a red piece of cardstock cut at 2.5" ( I think) x 4" glued to the bottom half.  The ribbon is from my scraps.  I used Hero Arts - Joy to All stamps and silver heat embossing powder to create the sentiment. I added googly eyes and a pink pom pom for his nose for a more realistic look. I embosses his beard with my D'vine Swirls Cuttlebug folder. Then I finished him off with a bit of sparkle (ok maybe more than a bit) to this mustache, beard and hat.
The Cut:
* Santa - Doodlecharms - 3"
Thank you so much for hopping with us today.  Next up is Georgianna from Carson’s Creations.  She is one of my favorites and I'm sure she has something spectacular for you.  Before you go don't forget to check out my blog candy at the bottom of this post :) Also, make sure you go back to Elaine when you have hopped to and followed all of the blogs to enter into her fabulous Grand Prize!

Lost?  Don't worry - Here's the whole line up: 
* Tiffany - Sparkled Memories  (You Are Here!)
* Georgiana - Carson’s Creations (Next Stop!)

What's a blog hop with out some magnificent blog candy?  I'm offering this blog candy to one lucky commenter.  As usual, I tried to match our theme and find some wonderful holiday things. I couldn't forget to add some sparkle too! All you have to do is leave a comment on this post.  You don't have to be a follower, but of course I would love it if you were :)  Be sure to leave a way for me to contact you, in case you win! I will use random.org to choose a winner on Monday, July 25th.  *~* Thanks for stopping by*~*

I'm linking this project up to:


Fabulous Birthday Cards!

Wednesday, July 20, 2011

When I first got my Forever Young cartridge I knew I had to use the sunglasses, but I didn't have anyone/anything to use them for.  Lucky for me two of my most fabulous friends have birthdays this time of year and the cut was perfect for them.  So after I glittered my entire house green I came up with these:
 
Here's what I did: The card base was cut at 5.5" x 8.5" and scored at 4.25".  The purple mat is 4" x 5.25" and the patterned paper is 3.75" x 5".  I used my gypsy to figure out the size for the glasses and words (from the cartridge I won from Sherrie Scraps with Passion).  I also hid the bow cut that came with the saying and added the dots with a white gel pen. Of course I had to add some sparkle and I decided on lime green glitter from Oriental Trading.  I also added Glossy Accents to the lens to make them look real.  Here is a tip I have learned about glittering and glossy accents:  Glue your pieces together. Use the glossy accents first and allow it plenty of time to dry. Then add your glitter.  This way you don't end up with glitter in your glossy accents (which is what happen when I did it the other way around on my High Heels Thank You Card)! The purple ribbon is from Hobby Lobby. On the inside I cut I piece of pattern paper ( I think 1.75") and same pink cardstock (2" I think) to make the gift card holder. I glued them together. Then added adhesive to the bottom and sides to make a pocket that the gift card could slide inside.  All of my papers and the the "Happy Birthday" are from The Paper Studio.
My Cricut Cuts:
* Sunglasses - Forever Young - 1.25"
* "It's Your Birthday" - Birthday Bash - 2.50"
I think they turned out super cute, but of course I'd love to hear what you think!  Be sure to come back on Friday for the Christmas in July blog hop hosted by Elaine at Expressions by Elaine. There will be some amazing inspiration and not to mention spectacular blog candy!  *~*Thanks for stopping by*~*

I'm Linking This Up At: